The exception handling features help us deal with the unforeseen errors which could appear in our code. To handle exceptions we can use the try-catch block in our code as well as finally keyword to clean up resources afterward.
Even though there is nothing wrong with the try-catch blocks in our Actions in Web API project, we can extract all the exception handling logic into a single centralized place. By doing that, we make our actions more readable and the error handling process more maintainable. If we want to make our actions even more readable and maintainable, we can implement Action Filters. We won’t talk about action filters in this article but we strongly recommend reading our post Action Filters in .NET Core.
In this article, we are going to handle errors by using a try-catch block first and then rewrite our code by using built-in middleware and our custom middleware for global error handling to demonstrate the benefits of this approach. We are going to use an ASP.NET Core Web API project to explain these features and if you want to learn more about it (which we strongly recommend), you can read our ASP.NET Core Web API Tutorial.
To download the source code for our starting project, you can visit the Global error handling start project.
For the finished project refer to Global error handling end project.
Let’s start.
Error Handling With Try-Catch Block
To start off with this example, let’s open the Values Controller from the starting project (Global-Error-Handling-Start project). In this project, we can find a single Get() method and an injected Logger service.
It is a common practice to include the log messages while handling errors, therefore we have created the LoggerManager service. It logs all the messages to the C drive, but you can change that by modifying the path in the nlog.config file. For more information about how to use Nlog in .NET Core, you can visit Logging with NLog.
Now, let’s modify our action method to return a result and log some messages:
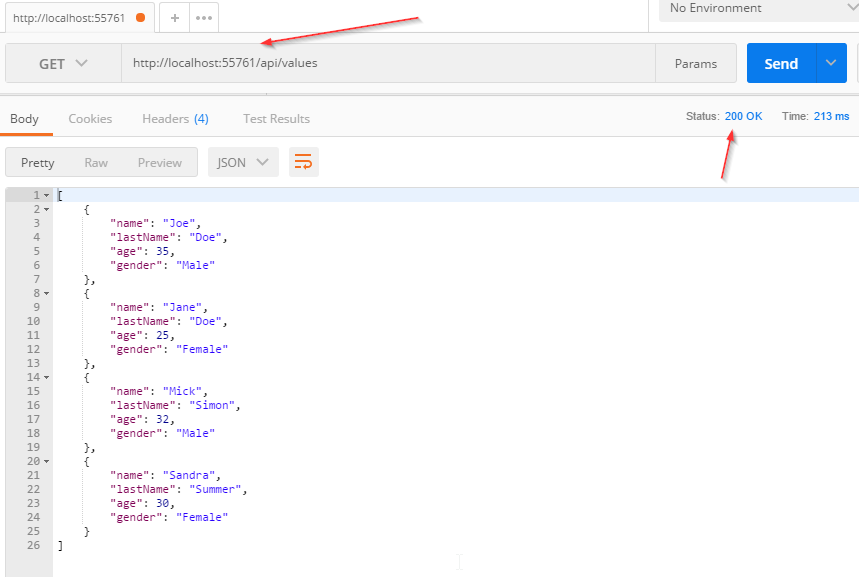
When we send a request at this endpoint, we will get this result:
And the log messages:
We see that everything is working as expected.
Now let’s modify our code, right below the GetAllStudents() method call, to force an exception:
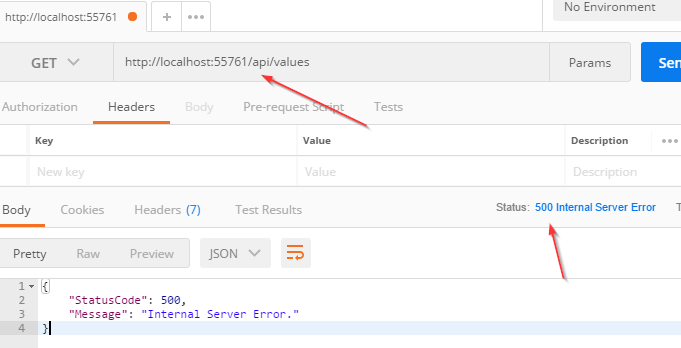
Now, if we send a request:
And the log messages:
So, this works just fine. But the downside of this approach is that we need to repeat our try-catch blocks in all the actions in which we want to catch unhandled exceptions. Well, there is a better approach to do that.
Handling Errors Globally With the Built-In Middleware
The UseExceptionHandler middleware is a built-in middleware that we can use to handle exceptions in our ASP.NET Core Web API application. So, let’s dive into the code to see this middleware in action.
First, we are going to add a new class ErrorDetails in the Models folder:
We are going to use this class for the details of our error message.
To continue, let’s create a new folder Extensions and a new static class ExceptionMiddlewareExtensions.cs inside it.
Now, we need to modify it:
In the code above, we’ve created an extension method in which we’ve registered the UseExceptionHandler middleware. Then, we populate the status code and the content type of our response, log the error message and finally return the response with the custom-created object.
To be able to use this extension method, let’s modify the Configure method inside the Startup class for .NET 5 project:
Or if you are using .NET 6 and above:
Finally, let’s remove the try-catch block from our code:
And there you go. Our action method is much cleaner now and what’s more important we can reuse this functionality to write more readable actions in the future.
So let’s inspect the result:
And the log messages:
Excellent.
Now, we are going to use custom middleware for global error handling.
Handling Errors Globally With the Custom Middleware
Let’s create a new folder named CustomExceptionMiddleware and a class ExceptionMiddleware.cs inside it.
We are going to modify that class:
The first thing we need to do is to register our IloggerManager service and RequestDelegate through the dependency injection. The _next parameter of RequestDeleagate type is a function delegate that can process our HTTP requests.
After the registration process, we create the InvokeAsync() method. RequestDelegate can’t process requests without it.
If everything goes well, the _next delegate should process the request and the Get action from our controller should generate a successful response. But if a request is unsuccessful (and it is, because we are forcing an exception), our middleware will trigger the catch block and call the HandleExceptionAsync method.
In that method, we just set up the response status code and content type and return a response.
Now let’s modify our ExceptionMiddlewareExtensions class with another static method:
In .NET 6 and above, we have to extend the WebApplication type:
Finally, let’s use this method in the Configure method in the Startup class:
Great.
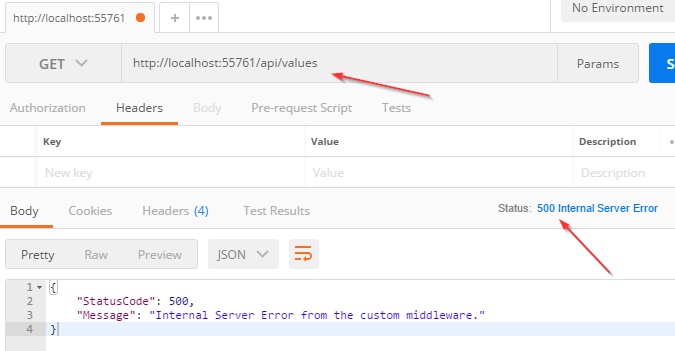
Now let’s inspect the result again:
There we go. Our custom middleware is implemented in a couple of steps.
Customizing Error Messages
If you want, you can always customize your error messages from the error handler. There are different ways of doing that, but we are going to show you the basic two ways.
First of all, we can assume that the AccessViolationException is thrown from our action:
Now, what we can do is modify the InvokeAsync method inside the ExceptionMiddleware.cs class by adding a specific exception checking in the additional catch block:
And that’s all. Now if we send another request with Postman, we are going to see in the log file that the AccessViolationException message is logged. Of course, our specific exception check must be placed before the global catch block.
With this solution, we are logging specific messages for the specific exceptions, and that can help us, as developers, a lot when we publish our application. But if we want to send a different message for a specific error, we can also modify the HandleExceptionAsync method in the same class:
Here, we are using a switch expression pattern matching to check the type of our exception and assign the right message to the message variable. Then, we just use that variable in the WriteAsync method.
Now if we test this, we will get a log message with the Access violation message, and our response will have a new message as well:
One thing to mention here. We are using the 500 status code for all the responses from the exception middleware, and that is something we believe it should be done. After all, we are handling exceptions and these exceptions should be marked with a 500 status code. But this doesn’t have to be the case all the time. For example, if you have a service layer and you want to propagate responses from the service methods as custom exceptions and catch them inside the global exception handler, you may want to choose a more appropriate status code for the response. You can read more about this technique in our Onion Architecture article. It really depends on your project organization.
Conclusion
That was awesome.
We have learned, how to handle errors in a more sophisticated way and cleaner as well. The code is much more readable and our exception handling logic is now reusable for the entire project.
Thank you for reading this article. We hope you have learned new useful things.


.png)

0 comments:
Post a Comment
Note: only a member of this blog may post a comment.