Virtual Network aka VNet is a simplified version of the internet. This allows to provision and manages different virtual private networks (VPN) to make an isolated and highly secured network. It also allows configuring to link different VNets. This can resemble as a set of connected systems and servers which can communicate between each other but it cannot be accessed via the internet. The resources like virtual machines inside a virtual network can only respond to requests that initiate from that virtual network. A Special VPN key is required to access the VMs or web applications which are deployed in virtual private networks.
What is Azure Virtual Network
Azure Virtual Network is a cloud service offering from Microsoft which is a representation of a virtual network in the cloud. In general, Azure Virtual Networks are used to secure development and deployment environments with any kind of network attacks and data leaks. Virtual machines, web apps, database, load balancer etc. should always be kept inside the Virtual network. With Azure, it is very easy to create and configure highly secure private networks with the help of network security groups.
Azure Virtual Network Architecture
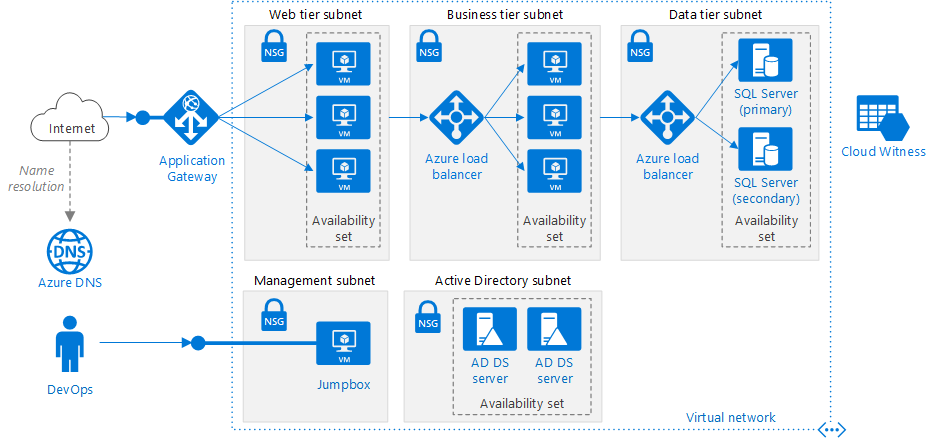
source https://docs.microsoft.comThe above is a typical architecture of a virtual Network for n-tier application architecture. The entire virtual network has been subdivided into different subnets based on workloads like web tier that contains the User interface, the Business tier that operates the business logic and data tier that hosts the data source. The idea to create and bind each group of Virtual machines into different subnet is useful in a way that we can assign one Network Security Group (NSG) to each subnet and can control the traffic flows between the tiers. For example, an HTTP request from the internet should not directly reach to data tier subnet. We can assign access policy to the Network Security Group of Subnet attached with data tier which only allows incoming requests from business tier subnet. Any other requests trying to reach data tier with any protocol other than business tier will be denied. Similarly, we can assign an access policy on NSG of business tier subnet that the incoming request source IP address should fall in the range of web tier subnet. Additionally, we can also control the traffic requests to the Active Directory by putting that in a separate Subnet inside a Virtual Network.
Before we go ahead and create a Virtual Network, there are a couple of terms to understand :
Resource Group
A Resource Group is a logical container for all related resources. Generally, all the Azure resources created for a particular environment like test environment can be put in a single resource group and assign access to users as per need. For any application architecture all resources (like VMs, VNets, IP, App Service, Azure Functions etc.) which combine make a complete system need to be replicated for each environment like Dev, Test, UAT, Pre-Prod, and Prod. So, we can have different resource group for each environment and create all required resources within the corresponding resource group. Then, we can provide access to the test team to the test resource group only and dev team to the dev resource group only.
Public IP
Resources like websites, API apps, Load balancers, Application gateways will require a public IP address in order to receive requests from the internet and that is achieved by a public IP address. We can also have a public IP address for the Virtual Machines but it is not recommended as it can allow malicious attacks. Subnet: A subnetwork or simply subnet is a range of IP addresses within a Virtual Network. It can be considered as all the machines in a particular project of an organization are having a separately identifiable IP addresses corresponding to a particular range. Now, we can assign a network security group to this range of IP addresses (Subnet) in order to allow some RDP connection to Project specific machines. Different tiers of an application architecture are also placed in different subnets to isolate them from each other.
Network Security Group
A network security group is a set of rules or policies for incoming and outgoing requests. A network security group is generally attached at the subnet level. The advantage of applying network security groups to Subnets is that we can control the data flow. This is important in terms of network security. With an NSG, we can define the IP range for the source of incoming requests.
Create a Virtual Network using the Azure Portal
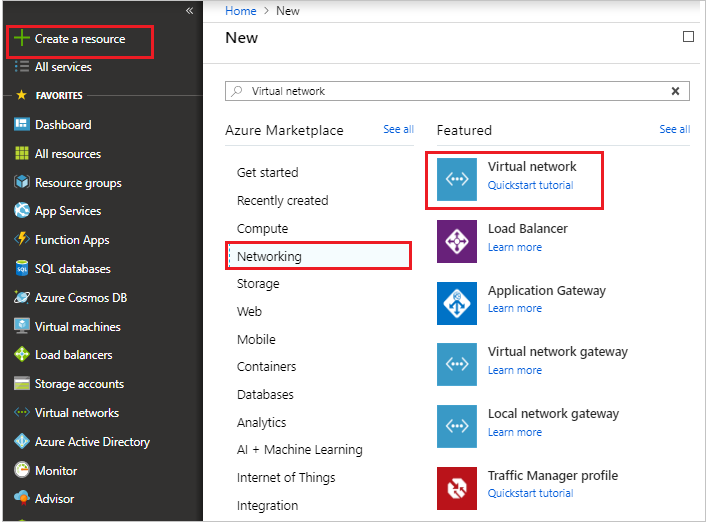
Login to the Azure portal portal.azure.com and click on Create a resource.
On the Marketplace select Networking tab and click on Virtual network as shown below.
In the Create VNet screen, provide a name to the virtual network and an address space. Choose subscription, resource group and location.
Additionally, also provide a subnet name and address space which should fall within the range of address space of virtual network and click on Create button.
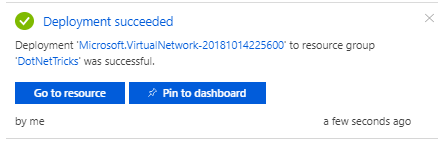
From the top right corner notification tab, click on Go to resource button.
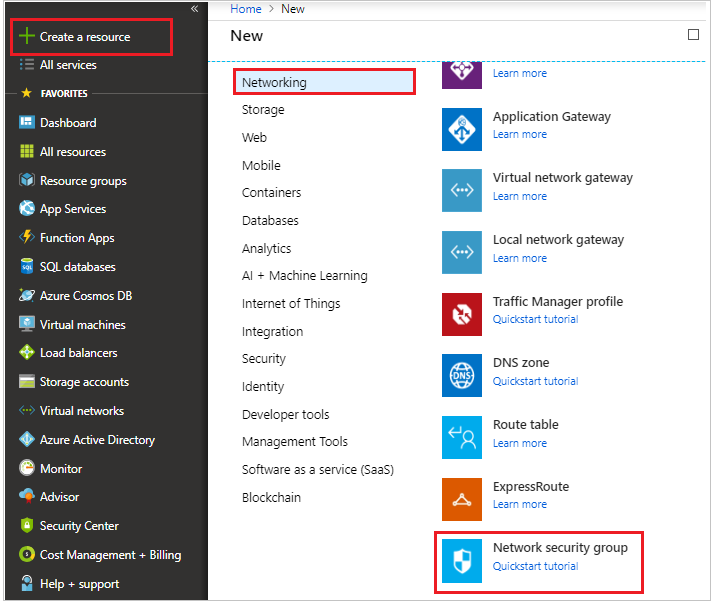
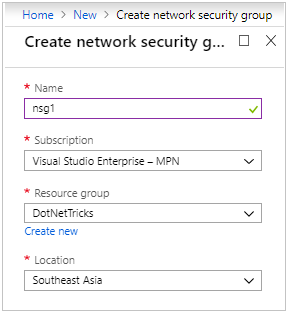
Let’s create a network security group. Click on Create a resource and select Networking tab and click on Network Security group.
Provide name, subscription, resource group and location.
Click on create button.
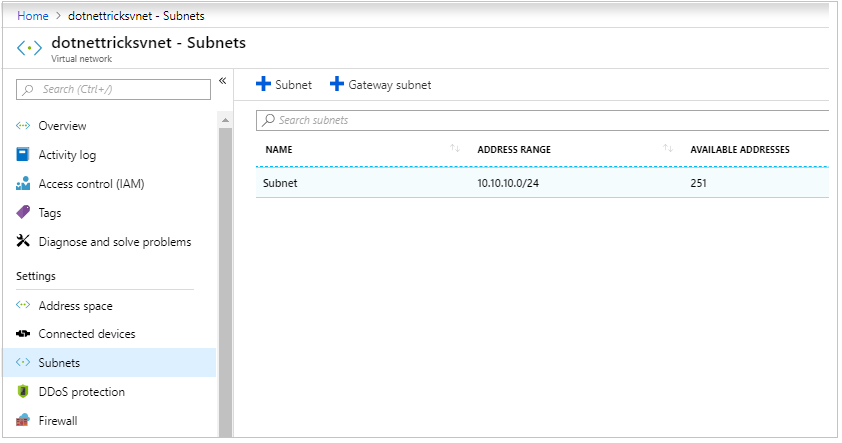
Go back to the virtual network and click on subnets.
Select the subnet and open its details.
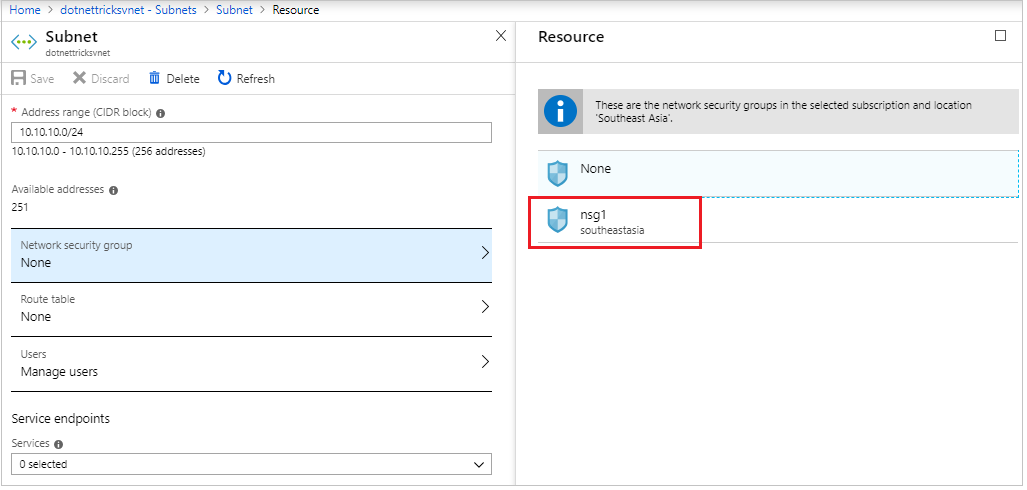
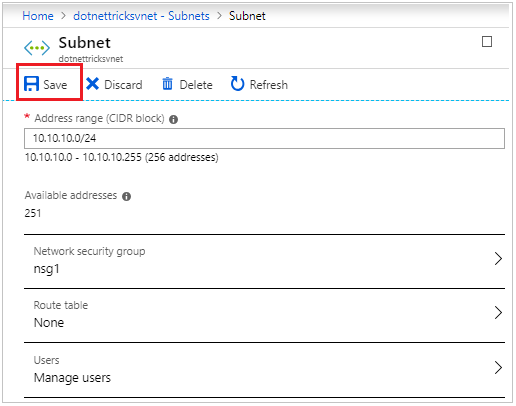
We can attach the network security group to the subnet and save.
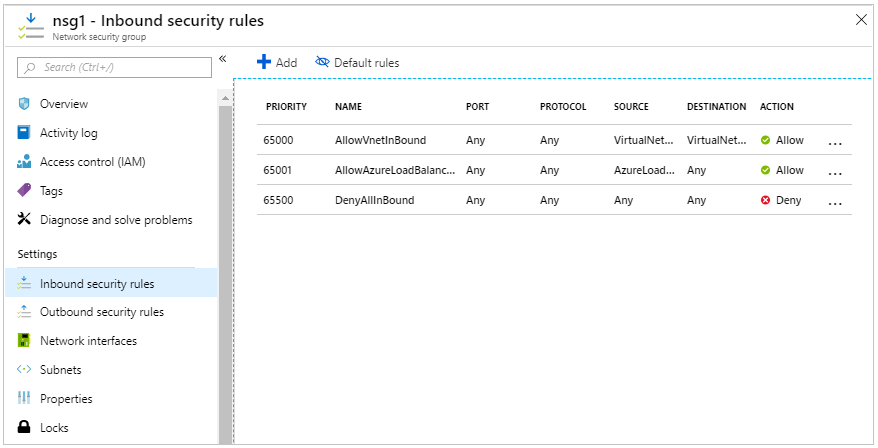
Go to the network security group and click on Inbound security rules.
We can add/ delete more security rules to enhance network security.

Creating a Virtual Network using PowerShell
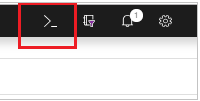
Launch cloud shell from the top on the portal.
Alternatively, open PowerShell command prompt locally on the system. Check for the latest version of AzureRM module. To continue, the version should be 5.4.1 or later. Run the below command to check for version
Get-Module -ListAvailable AzureRM
Login to Azure with the following command :
Connect-AzureRmAccount
Create a resource group by running the following command :
New-AzureRmResourceGroup -Name DNTResourceGroup -Location EastUS
Create a Virtual Network in the same location where resource group is and attach the Vnet with the resource group
$virtualNetwork = New-AzureRmVirtualNetwork `
 -ResourceGroupName DNTResourceGroup `
 -Location EastUS `
 -Name DNTVirtualNetwork `
 -AddressPrefix 10.10.0.0/16
Create a subnet within the virtual network
$subnetConfig = Add-AzureRmVirtualNetworkSubnetConfig `
 -Name default `
 -AddressPrefix 10.10.0.0/24 `
 -VirtualNetwork $virtualNetwork
Now that our Virtual Network is ready, we can assign this virtual network to Virtual machines. Let’s create a VM with the following command :
New-AzureRmVm `
 -ResourceGroupName " DNTResourceGroup " `
 -Location "East US" `
 -VirtualNetworkName "DNTVirtualNetwork" `
 -SubnetName "default" `
 -Name "DNTVm1" `
 -AsJob
Get the IP address of VM with the help of following command
Get-AzureRmPublicIpAddress
 -Name DNTVm1
 -ResourceGroupName DNTResourceGroup | Select IpAddress
Using the IP from the above command, run the below command to download the RDP file and use it to connect the VM.
mstsc /v:<publicIpAddress>
Summary
A virtual Network is a network of IP addresses in a range connected together. It is an important aspect of consideration while designing solutions in the cloud. In order to secure each layer of application architecture inside a highly secured network, it is recommended to create different subnets for different tiers of application and attach each subnet with a network security group with limited inbound and outbound security rules.


.png)
0 comments:
Post a Comment
Note: only a member of this blog may post a comment.