React Motion Animation Example is the today’s leading topic. When building web application UIs, I’ve always been a big fan of transitions. Today, I will show you how to create motion animation on a website. I will use React 16.3.2 and React Motion Library. In this small React application, we make a Tile component and add a React Animation to it. It is just a primary example and no big deal.
React Motion Animation Example
Okay, we start our tutorial by installing React js on our machine. Go to your terminal and type the command.
Step 1: Install React and other dependencies.
Install it via the following command.
npx create-react-app motionreact
It will create a boilerplate for us. Now, go into that folder.
cd motionreact
Install React Motion Library using the following command.
yarn add react-motion styled-components bootstrap

or

npm install react-motion styled-components bootstrap --save
Step 2: Create a Tile component.
Now, inside src folder, create one file called Tile.js.
// Tile.js

import React, { Component } from 'react';

export default class Tile extends Component {
  render() {
    return (
        <div className="card">
            <div className="card-body">
                <h5 className="card-title">
                  React Motion Animation Tutorial
                </h5>
                <p className="card-text">
                    Simple React Animation Tutorial With An Example
                </p>
            </div>
        </div>
    );
  }
}
Next step is to import this Tile.js file inside App.js file.
// App.js

import React, { Component } from 'react';
import '../node_modules/bootstrap/dist/css/bootstrap.min.css';

import Tile from './Tile';

export default class App extends Component {
  render() {
    return (
      <div>
        <Tile />
      </div>
    );
  }
}
UI looks like this.
Step 3: Use React Motion Animation Library.
It has following Helpers.
- spring
- Motion
- StaggeredMotion
- TransitionMotion
- presets
In our example, we only explore spring and Motion.
spring: (value: number, config?: SpringHelperConfig) => OpaqueConfig
It specifies the how to animate to the destination value, e.g.,
spring(10, {stiffness: 120, damping: 17})means “animate to value 10, with a spring of stiffness 120 and damping 17″.value: the value.config: optional, for further adjustments. Possible fields:stiffness: optional, defaults to170.damping: optional, defaults to26.precision: optional, defaults to0.01. Specifies both the rounding of the interpolated value and the speed (internal).
<Motion />
Usage
<Motion defaultStyle={{x: 0}} style={{x: spring(10)}}>
  {interpolatingStyle => <div style={interpolatingStyle} />}
</Motion>
style: Style
Required. The
Style type is an object that maps to either a number or an OpaqueConfig returned by spring() above. defaultStyle?: PlainStyle
Optional. The
PlainStyle type maps to numbers. Defaults to an object with the same keys as style above, whose values are the initial numbers you’re interpolating on.children: (interpolatedStyle: PlainStyle) => ReactElement
Required function.
interpolatedStyle: the interpolated style object passed back to you. E.g. if you gavestyle={{x: spring(10), y: spring(20)}}, you’ll receive asinterpolatedStyle, at a certain time,{x: 5.2, y: 12.1}which you can then apply on yourdivor something else.- Return: must return one React element to render.
Now, we need to change the App.js file and scale our tile component.
// App.js

import React, { Component } from 'react';
import { Motion, spring } from 'react-motion';
import '../node_modules/bootstrap/dist/css/bootstrap.min.css';

import Tile from './Tile';

const MotionTile = props => {
  return (
      <Motion
        defaultStyle={{ scale: 0.5 }}
        style={{ scale: spring(1, { stiffness: 170, damping: 26 }) }}
      >
        {interpolatedStyle => <Tile scale={interpolatedStyle.scale} {...props} />}
      </Motion>
  );
};

export default class App extends Component {
  render() {
    return (
      <div>
        <MotionTile />
        <MotionTile />
        <MotionTile />
      </div>
    );
  }
}
We are passing the scale props to the child component, and in our case it is Tile. So we need to change Tile.js as well.
// Tile.js

import React, { Component } from 'react';
import styled from 'styled-components';

const TileWrapper = styled.div`
  background: #fff;
  max-width: 500px;
  margin: 2rem auto;
  box-shadow: 0 0 10px rgba(0, 0, 0, 0.1);
  border-radius: 5px;
  transform: ${props => `scale(${props.scale})`};
`;

export default class Tile extends Component {
  render() {
    const { scale } = this.props;
    return (
      <TileWrapper scale={scale}>
        <div className="card">
            <div className="card-body">
                <h5 className="card-title">
                  React Motion Animation Tutorial
                </h5>
                <p className="card-text">
                    Simple React Animation Tutorial With An
                </p>
            </div>
        </div>
      </TileWrapper>
    );
  }
}
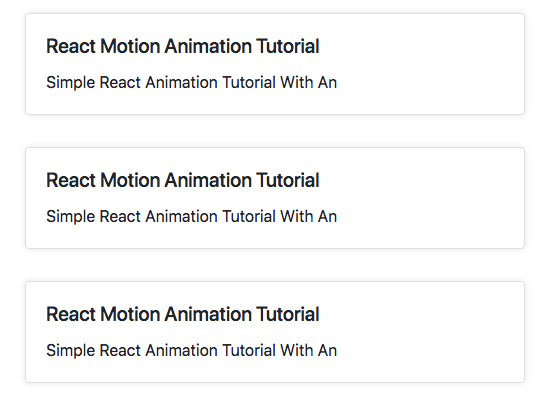
We have created one wrapper around the tile to look great and also gave some height and width. We are receiving the props scale here.
Also, we are transforming the component on the scale provided by the parent component. So after saving the file, we need to go to the browser and see our changes.
Yikes!! We are getting the Motion Animation on the Tile component.
Finally, React Motion Animation Example is over. Thanks for taking.


.png)
0 comments:
Post a Comment
Note: only a member of this blog may post a comment.